Monday, March 12, 2007
Make a MOOPocket!
BREAKING NEWS: I now have MOOPockets avaliable for sale. Visit my Etsy shop, and if you don't see a MOOPocket you like, check back. I'll be updating and restocking just as fast as I can make more!
Disclaimer:
This is not a project for the faint of heart, the impatient or those who dislike the details. I don't wanna sound scary, but if the idea of sewing small things, like say, Barbie clothes, makes you want to run for the Valium, this is probably not the project for you, because it's trickier and more tedious than sewing Barbie clothes. Really. And it might take you more than one try to get one that looks halfway decent. I'm just sayin.
If you absolutely MUST have a MOOPocket can can't bear the idea of an hour or two of messing around with trying to sew something very tiny, email me and I'll consider making and selling you one. Be quick, however, because there is a limit even to my sanity and making these things might be just a little insane.
**PLEASE NOTE**
The following is for personal and non-commercial use only. The MOOPocket name, design and pattern is property of Splatgirl Creates and may not be reproduced or sold without my permission.
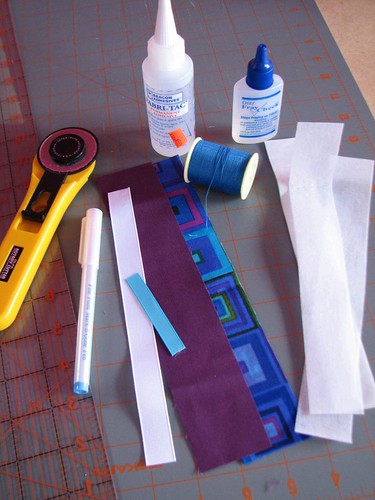
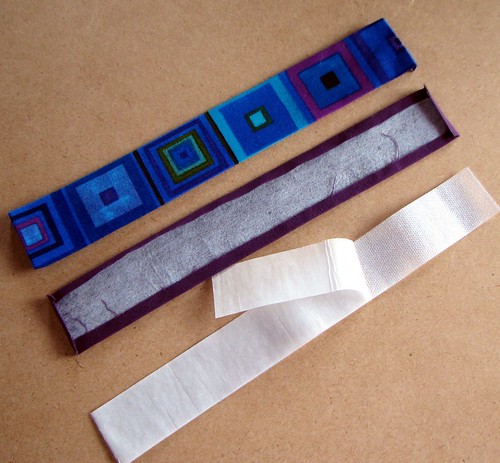
What you'll need:
2 strips fabric, 9" long by 1 3/4" wide
2 strips heavyweight fusible interfacing and 1 strip Steam A Seam or other double stick fusible web ,
8 1/2" long by 1 1/4" wide
1/2" woven ribbon, 7 3/4" long
3" narrow woven ribbon, snap or velcro dot for closure
fabric marking pen
Fabri-Tac fabric glue
Fray Check
Rotary cutter, mat and ruler for cutting fabric strips
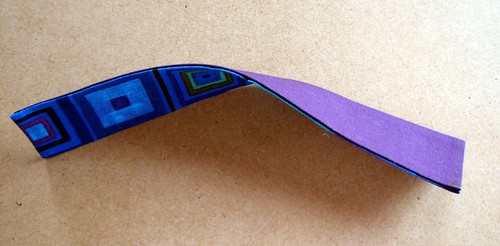
Start by fusing the strips of interfacing to the wrong sides of both strips of fabric, making sure to center then side to side and end to end, so that you have a 1/4" raw edges all the way around:
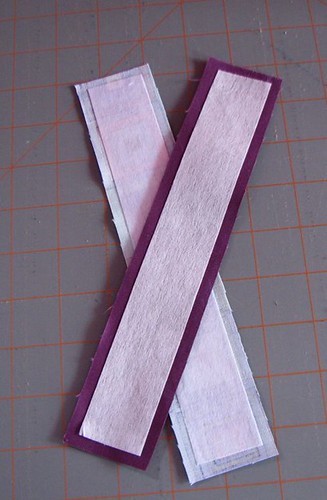
In order to keep your cards nice and pretty, you want the MOOPocket to be nice and sturdy which is why we've used heavyweight interfacing and applied it to both pieces of fabric.
Carefully fold and press the raw edges of the fabric strips to the inside, using the edge of the interfacing as a guide. Be neat and use lots of steam. Spray starch works nicely, too.
Peel off one side of the paper backing from the strip of Steam A Seam and fuse it to the wrong side one of the fabric strips:
Remove the paper from the remaining side of the Steam A Seam. Place the second fabric strip on top of the first, wrong sides together and fuse. You should now have a two sided strip with finished edges on all four sides:
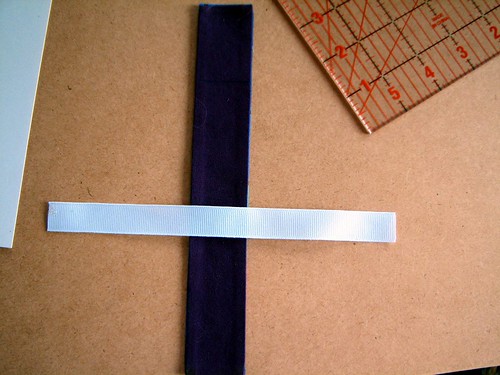
For this project, the solid colored fabric will be the inside of the MOOPocket. Using a washable fabric pen, mark horizontal lines across the strip at 3" 3 1/2" and 6 1/2".
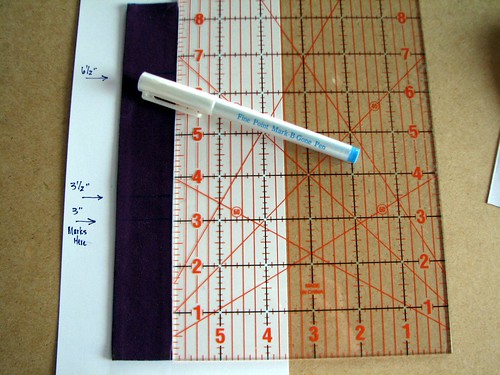
Find the center of the piece of 1/2" wide ribbon. Using a small piece of Steam A Seam or glue, attach the ribbon between the 3" and the 3 1/2" marks on the fabric making sure it's centered so that the ends that extend past the fabric strip are of equal length. Fuse or glue 1/4" hems on ribbon ends:
You'll notice that I've used white ribbon for this MOOPocket. That's mostly so that you can see what's going on a little better. Likewise the contrasting thread. Normally I would choose ribbon and thread to match the fabrics.
Stitch the ribbon to the fabric strip in a rectangle, staying close (1/16") to edges:
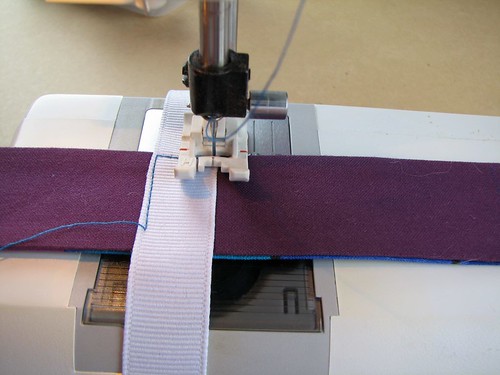
Fold either end of the fabric strip up and over the ribbon and press. This forms what will become the bottom of the MOOPocket:
Apply a tiny, thin bead of glue along the very edge of one of the short sides of the fabric strip. Attach ribbon being sure to match edges and ends. Glue remaining end of ribbon along opposite side in the same manner:
This is basically just glue basting but DO NOT under any circumstances skip this step your you'll seriously want to scream when you try to sew things up. I've chosen to use Fabri-Tac which is permanent, mostly because the bottle has a very pointy tip, allowing for a very, very thin line of glue (and because it's what I had on hand). If the glue bead is too wide, too much of the ribbon will stick to the fabric and the MOO cards won't fit when the pocket is done.
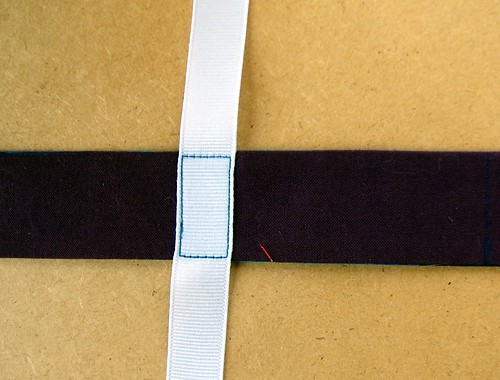
Stitch ribbon to fabric, keeping 1/16" from edge, and repeat for the other side:
As you can see in the two pictures above, I've folded the base of the MOOPocket up at a 45 degree angle to facilitate sewing all the way down to the corner.
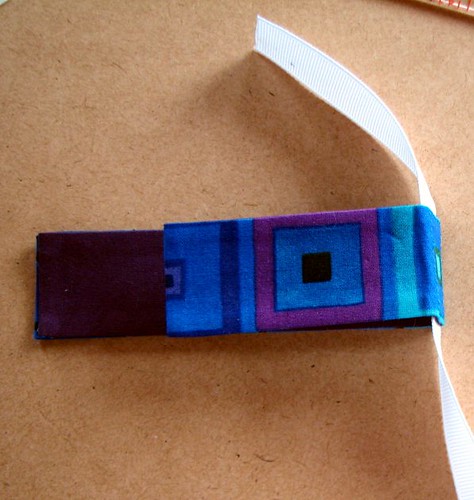
You should now have something that looks like this:
Both tails of ribbon have been stitched to the short end of the fabric strip.
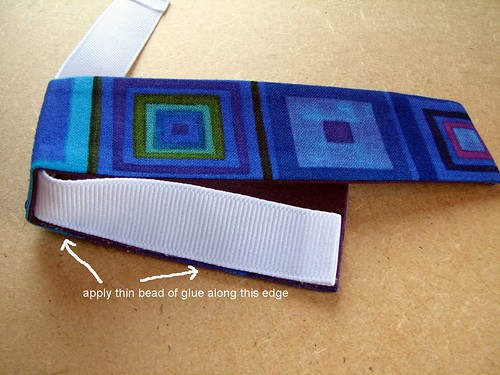
To make the next step easier, open out the ribbon edges to either side and press as if you were pressing open a seam allowance.
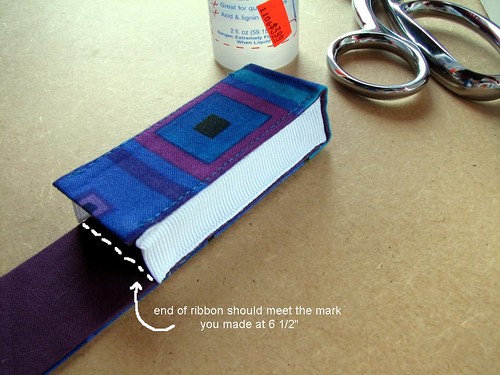
Repeat the edge gluing procedure as described above, making sure hemmed edges of ribbon end at the mark you placed previously. Repeat for other side:
Let the glue dry for a good minute or two at this point because you're going to need to smush things around quite a bit in the next step in order to do the stitching.
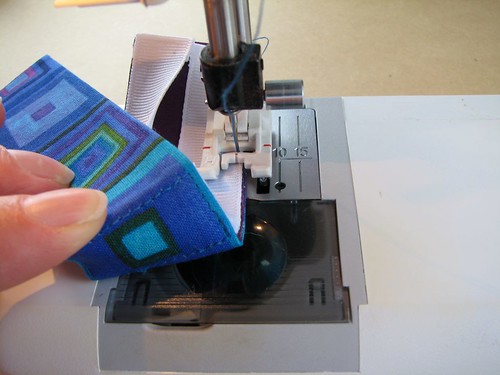
Starting as shown, edge stitch up one side of the flap, around the corners and down onto the right side ribbon edge all the way to the corner of the base. NOTE: The left ribbon edge has not been stitched yet. Start sewing at the top of the ribbon just like in the picture:
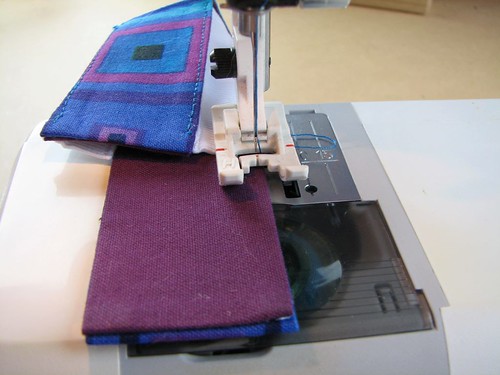
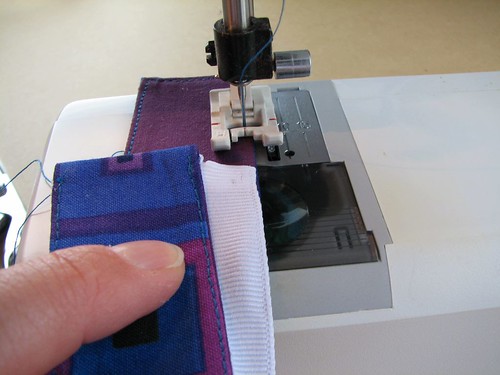
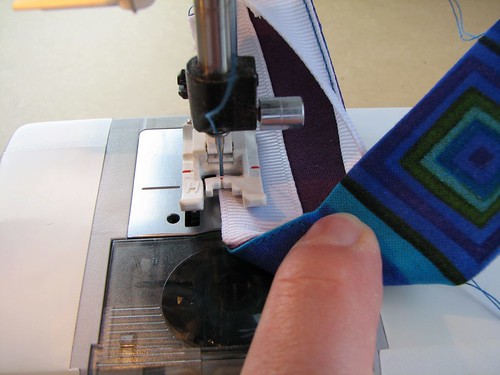
Turn pocket around and sew down left edge to corner:
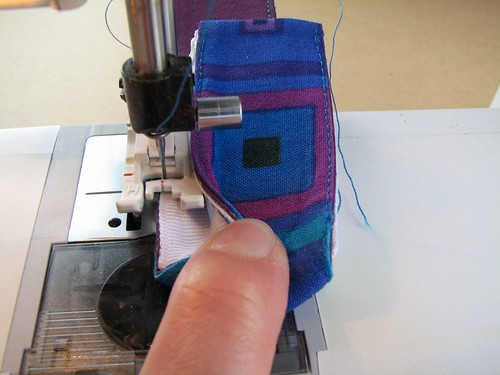
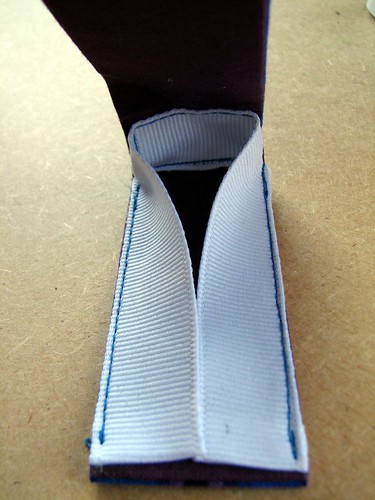
Your MOOPocket should now look like this:
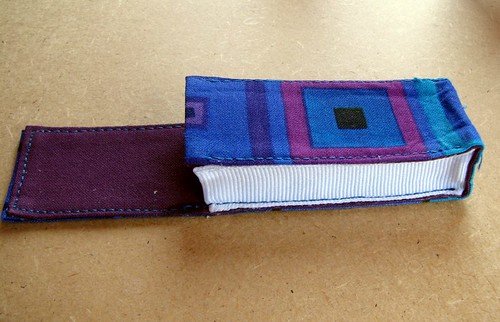
Press two folds in the flap, one at the top of the ribbon sides and another 1/2" from that so that the flap conforms to the shape of the pocket when it's closed. To press the rest of the pocket, I stuck it on two of my fingers and held it up to the iron, but a smart person would make a little tailors MOOPocket ham kind of thingie to stick inside and hold the shape so it can be pressed nicely...
For a ribbon closure, turn the edges of the 3" piece of narrow ribbon in 1/4" and and glue or fuse. Stitch to pocket at back edge seams about 1/4" from top edge of pocket:

Alternately, add a snap or velcro dot for a closure.
Apply Fray Check to the seams anywhere you stopped or started sewing, just in case.
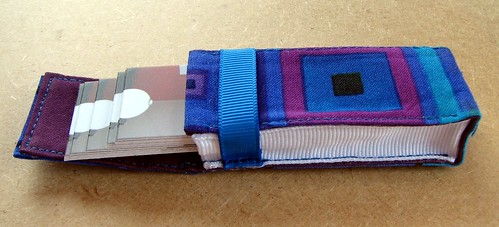
Now you're ready to add MOO's!! The MOOPocket will hold 15 or 20 cards.
Comments:
<< Home
wow, this is AWESOME! i love my moocards and would love a moocase. i have a 9 month old though, and we're moving shortly. so i don't think i'll be making it anytime soon! :) but it's awesome and a great tutorial!

I just happened onto your Moopocket a moment ago. What is it for? Why do I need one? Looks like I might even though I do not know what I would use it for. I love a challenge.
# posted by  : 1:42 PM
: 1:42 PM
I was curious too, Google to the rescue!
http://www.moo.com/
"Make 100 different MiniCards for just $19.99."
"For those of you with a ruler, the MiniCards are 28mm x 70mm. For those of you who left your pencil case at home, that’s roughly half the size of a normal, boring old business card."
http://www.moo.com/
"Make 100 different MiniCards for just $19.99."
"For those of you with a ruler, the MiniCards are 28mm x 70mm. For those of you who left your pencil case at home, that’s roughly half the size of a normal, boring old business card."
excellent tutorial. Easy to understand and the pictures are great! Now I gotta get me some moo cards so I can make this!!
Neat idea.
For un-crafty and/or lazy people, Altoids Chewing Gum comes in a metal tin that is the perfect size for Moo cards.
For un-crafty and/or lazy people, Altoids Chewing Gum comes in a metal tin that is the perfect size for Moo cards.
# posted by : 10:21 PM
: 10:21 PM
Gorgeous! I frantically looked for your e-mail address so I could ask how much you're charging to make them but couldn't find an e-mail address. :-(
you should make a couple and then sell them on etsy.com they are awesome i would love to have one but i dont have any valium around and im too damn lazy
# posted by : 10:38 AM
: 10:38 AM
I may be totally out of it, but what exactly is a MOO? Although I think the pockets are quite cute, I don't understand!!!!!!
# posted by : 10:53 PM
: 10:53 PM
What a GREAT idea!!!! I need one, I need one!!!! Now to decide whether to make one from your great tutorial or to visit etsy??!! hmmm. Such great fabrics too! love it!!!
Post a Comment
# posted by : 7:25 PM
: 7:25 PM << Home
![]()