
Monday, June 18, 2007
Cookie Baking 101: So You Think You Know How To Bake Cookies?
First I want to say hurray for whoever you are who told us about the existence of Cod Casino! Thankyouthankyouthankyou. You were just what I was hoping for...someone to come out of the woodwork and teach me about something new. And I just have to laugh, really, because Cod Casino seems like SUCH a Wisconsin thing to do!
And then I'm here to give you few of my well researched and hopefully helpful tips on cookie baking with the hope of redeeming myself for not giving you MY recipe the other day. The truth is, you don't need my recipe because spending a few minutes learning about cookie theory ala Casa Splatgirl will serve you much better and more completely than any one single recipe ever could anyway.
I should start by saying I am a connoisseur of the thickish, chewy, toothsome cookie and that what I am about to tell you applies only to cookies of that ilk. If you're a thin crispy person I can't help you or your cookies.
So, first and foremost: there is no acceptable substitute for butter in a cookie under any circumstances. Real, fresh, unadulterated stick butter.
If you don't have any, don't bake cookies. Anything other than butter is a violation of cookie union rules and punishment for breaking this rule will be swift and severe. Forget anything you may have heard back in the 80's about shortening doing x, y, or z for your cookies, because it's bunk and it will make them taste like sand. And don't even think of using that "butter" flavored junk. That stuff shouldn't even exist. Eu.
Anyway, I can detect a cookie made with shortening without ever taking a bite, and for me, it's a deal breaker and deplorable waste of calories. I'm such a fanatic about this no-shortening (or margarine...gack!) rule that I've even gone so far as adapting recipes that call for shortening, like my absolute favorite, molasses cookies from the old Better Homes and Gardens Cookbook:
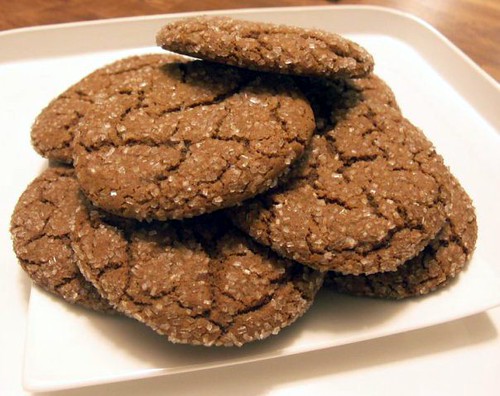
(thanks to Knit-Whit for the pic)
to be made with all butter and they're so, so much tastier as a result. But do make sure it's fresh, because using stale butter will make your cookies taste like stale butter. Imagine that.
I happen to use regular salted butter because I always have it on hand, and because the salt it contains helps it stay fresh longer and I don't have to worry about how long it's been in my fridge as much as if I were keeping unsalted butter. Plus I figure the store sells more of it which makes it likely to be fresher to begin with.
Second: Turn down the oven! The Toll House recipe and many others you'll come across ask for a temp of 375, but this is TOO HOT! I read some place long, long ago that a cookie should never bake at hotter than 350, and this advice has served me well ever since. If you need to, get an oven thermometer to make sure, and don't be afraid to go down to 325 if you need to depending on what you're baking. And don't be too lazy to rotate your pans halfway through cooking. Every oven I have ever used, including expensive convection ovens has had hotter and cooler areas, so rotate those pans 90 degrees and swap racks if you're doing two pans at once.
And speaking of pans, forget about those expensive insulated, textured and frou frou cookie sheets. At best they're unnecessary, and at worst they'll spoil the texture of your cookie. And if you think you need an insulated sheet or your cookies will burn, take heed of the above and reduce your oven temp!
All you need is a couple of aluminium restaurant sheet pans. They're inexpensive, durable, multi-purpose, and available everywhere. I get mine at the local restaurant supply, but you can order them online from any number of suppliers. Get a few in half-sheet and quarter sheet sizes and they'll likely never need replacing plus they'll deliver consistent, predictable results batch after batch.
I'm also going to hang myself out there and proclaim my dislike for baking cookies on a Silpat. First of all, they're expensive and I hate trying to wash and store them. Plus I find they insulate too much and interfere with browning and, as a result, texture. I do have and use a Silpat or two, but never, ever for cookies.
I prefer baking parchment to line my pans, and I buy mine in full sheet pan-sized leaves from the restaurant supply but it's also available at the grocery store in rolls. In a pinch, foil will work but again, I think parchment yields superior results.
Now that we've got those technicalities out of the way, lets talk about the actual cookie dough making process.
IMO, the single most important thing you can do for most any cookie is to cream properly. You know, the beating the sugar into the butter part? Most people pay much less attention to this step than it warrants without knowing any better, but it's where many a cookie starts to go bad, so be as patient and thorough with this step as you can be.
I always start with cold butter, but if you don't have a heavy duty stand mixer, it's OK to let the butter warm up just a bit, but ONLY a bit, until it's the consistency of modeling clay. Warmer than that and things have the potential to go wrong in a hurry. What you absolutely don't want is warm or even room-temp-on-a-hot-day butter because it melts and gets weird and misbehaves.
Add the sugars to the butter and start beating, keeping in mind that the point of this activity is to get the sugar to DISSOLVE into the butter and the whole thing to change color and become lighter and fluffy, and that this is going to several minutes of beating. LIGHTER in color, and fluffy, so that the sugar granules are smaller, almost to the point of disappearing and the mixture has increased in volume and is soft and airy. Are you hearing me? THIS IS THE MOST IMPORTANT STEP in making the perfect cookie, and the closer you can come to having the sugar crystals completely dissolved in the butter, the better off you'll be. This will happen more quickly if you use Baker's sugar (sold in a carton by C&H) which has a finer texture, but I don't consider this an essential ingredient. Regular granulated sugar works fine, it just takes a bit longer to incorporate well. And if you're not sure if you've beaten enough, take a bit of the mixture and rub it between your fingers. You should only be able to just barely feel the sugar granules if at all.
Incidentally, this advice about creaming holds even more true for cake baking. Get a good, light and fluffy cream with the sugar fully dissolved and your cake will be miles better for it.
BTW, did you know that not all brown sugar is the same? For the record, I almost always use dark brown for cookies because it's moister and more flavorful, but whether you prefer dark or light, read the label and look at the bag or box, because some "brown sugar" is beet sugar that has been sprayed with molasses, and this is NOT the same thing as real brown sugar which is cane sugar that still has some of the molasses left in it. Checking my pantry, I have C & H brand which is definitely the real thing. And when it comes to measuring, pack pack pack. The firmer the better, so put some muscle into it.
Now, once you've gotten to light and fluffy with the butter and sugars, add the eggs one at a time and start mixing them in on a slow speed until they're broken up and incorporated. Then turn up the speed and give everything a good whip for a few seconds, being sure to scrape down the bowl completely at least once or twice. The point here is that eggs contain water, and whatever sugar is left undissolved after being creamed with the butter (butter contains some water) will melt with the addition of the eggs. Starting out mixing slowly gives the sugar time to melt without letting the eggs get over beaten. Once everything is stirred together and friendly, you want to re-emulsify the mixture and get it back to the light and fluffy state without going overboard. I also add the vanilla or flavorings at this point, too. Again, look for a lightening in color and smooth, fluffy texture and once it gets there, stop beating and start stirring in your dry ingredients.
Ah yes, the dry ingredients. I should tell you here that I consider the flour requirement of cookie recipes as just a suggestion. Humidity, brand and your own measuring style will all affect the volume of flour in any given measure and the volume of flour is close behind the butter/sugar mix in it's ability to make or break your cookie. Even if you're scaling your ingredients as would be the professional method, 8 oz of flour in a dry climate will affect the recipe differently than 8 oz of flour in the thick humidity of a Minnesota summer. So don't be afraid to experiment by adding more or less flour and baking off a test cookie evaluate your proportions, keeping in mind that more flour equals a thicker cookie (in excess turning them into fat, dry lumps), and less flour equals a flatter, crispier cookie. And have a little patience here, as well, because it takes the flour a few minutes of mixing to start to absorb moisture and really incorporate. Likewise, I find that the longer the dough sits once I've thoroughly mixed in the flour and before I bake, the happier I am with the end result, presumably because the flour has had a chance to fully hydrate.
If you're using nuts (I wholeheartedly prefer almonds and insist on them and only them in my chocolate chip cookies) toast them in that same 350 oven for 7-10 minutes before you chop and they'll stay crunchier be more flavorful than if you hadn't toasted. Just be sure to let them cool completely before adding to the dough.
And buy your nuts whole! Shelled, yes, but those pre-chopped nut crumbs are absolutely forbidden and don't have any flavor anyway. Plus, whole nuts keep much longer (in a ziplock bag in the freezer if you don't use them up within a month or two, otherwise just a ziplock in the pantry is fine).
Once you're ready to bake and you've verified that your oven isn't too hot, consider the baking time. I rarely pay attention to the recipe in this regard, both because I'm usually not making my cookies the size that's called for, and because, as I've said, I've probably lowered the oven temperature at least 25 degrees.
If you're unsure, scoop out one cookie (as I said in my earlier post, my gadget of choice is a #16 ice cream scoop but you can choose any size you like...also avaliable inexpensively at the restaurant supply) and bake it off, checking it every minute or two as it bakes. I look for something on the verge of underbaked...just barely starting to brown around the very edges yet not wet looking in the center. You may need to bake one or two off and let them cool to evaluate because often, what looks underdone when it's hot from the oven is delicious and chewy and perfect once it cools. And keep in mind that a whole pan will require a couple of minutes longer than a single test cookie to achieve the same level of doneness, likewise two pans baking at once vs. one.
So...there are my secrets. If you weren't bored to tears and with your eyes glazed over, you should now be armed with several things to try to improve your own favorite recipe. Let me know how it goes! And do store your latest batch of lovelies in the freezer, won't you? There's nothing worse than a was-great cookie that's gone stale and tired from sitting out on the counter. Put them in a ziplock and freeze them to enjoy, fresh as the day they were baked, for as long as they're likely to last anyway.
And then I'm here to give you few of my well researched and hopefully helpful tips on cookie baking with the hope of redeeming myself for not giving you MY recipe the other day. The truth is, you don't need my recipe because spending a few minutes learning about cookie theory ala Casa Splatgirl will serve you much better and more completely than any one single recipe ever could anyway.
I should start by saying I am a connoisseur of the thickish, chewy, toothsome cookie and that what I am about to tell you applies only to cookies of that ilk. If you're a thin crispy person I can't help you or your cookies.
So, first and foremost: there is no acceptable substitute for butter in a cookie under any circumstances. Real, fresh, unadulterated stick butter.
If you don't have any, don't bake cookies. Anything other than butter is a violation of cookie union rules and punishment for breaking this rule will be swift and severe. Forget anything you may have heard back in the 80's about shortening doing x, y, or z for your cookies, because it's bunk and it will make them taste like sand. And don't even think of using that "butter" flavored junk. That stuff shouldn't even exist. Eu.
Anyway, I can detect a cookie made with shortening without ever taking a bite, and for me, it's a deal breaker and deplorable waste of calories. I'm such a fanatic about this no-shortening (or margarine...gack!) rule that I've even gone so far as adapting recipes that call for shortening, like my absolute favorite, molasses cookies from the old Better Homes and Gardens Cookbook:
(thanks to Knit-Whit for the pic)
to be made with all butter and they're so, so much tastier as a result. But do make sure it's fresh, because using stale butter will make your cookies taste like stale butter. Imagine that.
I happen to use regular salted butter because I always have it on hand, and because the salt it contains helps it stay fresh longer and I don't have to worry about how long it's been in my fridge as much as if I were keeping unsalted butter. Plus I figure the store sells more of it which makes it likely to be fresher to begin with.
Second: Turn down the oven! The Toll House recipe and many others you'll come across ask for a temp of 375, but this is TOO HOT! I read some place long, long ago that a cookie should never bake at hotter than 350, and this advice has served me well ever since. If you need to, get an oven thermometer to make sure, and don't be afraid to go down to 325 if you need to depending on what you're baking. And don't be too lazy to rotate your pans halfway through cooking. Every oven I have ever used, including expensive convection ovens has had hotter and cooler areas, so rotate those pans 90 degrees and swap racks if you're doing two pans at once.
And speaking of pans, forget about those expensive insulated, textured and frou frou cookie sheets. At best they're unnecessary, and at worst they'll spoil the texture of your cookie. And if you think you need an insulated sheet or your cookies will burn, take heed of the above and reduce your oven temp!
All you need is a couple of aluminium restaurant sheet pans. They're inexpensive, durable, multi-purpose, and available everywhere. I get mine at the local restaurant supply, but you can order them online from any number of suppliers. Get a few in half-sheet and quarter sheet sizes and they'll likely never need replacing plus they'll deliver consistent, predictable results batch after batch.
I'm also going to hang myself out there and proclaim my dislike for baking cookies on a Silpat. First of all, they're expensive and I hate trying to wash and store them. Plus I find they insulate too much and interfere with browning and, as a result, texture. I do have and use a Silpat or two, but never, ever for cookies.
I prefer baking parchment to line my pans, and I buy mine in full sheet pan-sized leaves from the restaurant supply but it's also available at the grocery store in rolls. In a pinch, foil will work but again, I think parchment yields superior results.
Now that we've got those technicalities out of the way, lets talk about the actual cookie dough making process.
IMO, the single most important thing you can do for most any cookie is to cream properly. You know, the beating the sugar into the butter part? Most people pay much less attention to this step than it warrants without knowing any better, but it's where many a cookie starts to go bad, so be as patient and thorough with this step as you can be.
I always start with cold butter, but if you don't have a heavy duty stand mixer, it's OK to let the butter warm up just a bit, but ONLY a bit, until it's the consistency of modeling clay. Warmer than that and things have the potential to go wrong in a hurry. What you absolutely don't want is warm or even room-temp-on-a-hot-day butter because it melts and gets weird and misbehaves.
Add the sugars to the butter and start beating, keeping in mind that the point of this activity is to get the sugar to DISSOLVE into the butter and the whole thing to change color and become lighter and fluffy, and that this is going to several minutes of beating. LIGHTER in color, and fluffy, so that the sugar granules are smaller, almost to the point of disappearing and the mixture has increased in volume and is soft and airy. Are you hearing me? THIS IS THE MOST IMPORTANT STEP in making the perfect cookie, and the closer you can come to having the sugar crystals completely dissolved in the butter, the better off you'll be. This will happen more quickly if you use Baker's sugar (sold in a carton by C&H) which has a finer texture, but I don't consider this an essential ingredient. Regular granulated sugar works fine, it just takes a bit longer to incorporate well. And if you're not sure if you've beaten enough, take a bit of the mixture and rub it between your fingers. You should only be able to just barely feel the sugar granules if at all.
Incidentally, this advice about creaming holds even more true for cake baking. Get a good, light and fluffy cream with the sugar fully dissolved and your cake will be miles better for it.
BTW, did you know that not all brown sugar is the same? For the record, I almost always use dark brown for cookies because it's moister and more flavorful, but whether you prefer dark or light, read the label and look at the bag or box, because some "brown sugar" is beet sugar that has been sprayed with molasses, and this is NOT the same thing as real brown sugar which is cane sugar that still has some of the molasses left in it. Checking my pantry, I have C & H brand which is definitely the real thing. And when it comes to measuring, pack pack pack. The firmer the better, so put some muscle into it.
Now, once you've gotten to light and fluffy with the butter and sugars, add the eggs one at a time and start mixing them in on a slow speed until they're broken up and incorporated. Then turn up the speed and give everything a good whip for a few seconds, being sure to scrape down the bowl completely at least once or twice. The point here is that eggs contain water, and whatever sugar is left undissolved after being creamed with the butter (butter contains some water) will melt with the addition of the eggs. Starting out mixing slowly gives the sugar time to melt without letting the eggs get over beaten. Once everything is stirred together and friendly, you want to re-emulsify the mixture and get it back to the light and fluffy state without going overboard. I also add the vanilla or flavorings at this point, too. Again, look for a lightening in color and smooth, fluffy texture and once it gets there, stop beating and start stirring in your dry ingredients.
Ah yes, the dry ingredients. I should tell you here that I consider the flour requirement of cookie recipes as just a suggestion. Humidity, brand and your own measuring style will all affect the volume of flour in any given measure and the volume of flour is close behind the butter/sugar mix in it's ability to make or break your cookie. Even if you're scaling your ingredients as would be the professional method, 8 oz of flour in a dry climate will affect the recipe differently than 8 oz of flour in the thick humidity of a Minnesota summer. So don't be afraid to experiment by adding more or less flour and baking off a test cookie evaluate your proportions, keeping in mind that more flour equals a thicker cookie (in excess turning them into fat, dry lumps), and less flour equals a flatter, crispier cookie. And have a little patience here, as well, because it takes the flour a few minutes of mixing to start to absorb moisture and really incorporate. Likewise, I find that the longer the dough sits once I've thoroughly mixed in the flour and before I bake, the happier I am with the end result, presumably because the flour has had a chance to fully hydrate.
If you're using nuts (I wholeheartedly prefer almonds and insist on them and only them in my chocolate chip cookies) toast them in that same 350 oven for 7-10 minutes before you chop and they'll stay crunchier be more flavorful than if you hadn't toasted. Just be sure to let them cool completely before adding to the dough.
And buy your nuts whole! Shelled, yes, but those pre-chopped nut crumbs are absolutely forbidden and don't have any flavor anyway. Plus, whole nuts keep much longer (in a ziplock bag in the freezer if you don't use them up within a month or two, otherwise just a ziplock in the pantry is fine).
Once you're ready to bake and you've verified that your oven isn't too hot, consider the baking time. I rarely pay attention to the recipe in this regard, both because I'm usually not making my cookies the size that's called for, and because, as I've said, I've probably lowered the oven temperature at least 25 degrees.
If you're unsure, scoop out one cookie (as I said in my earlier post, my gadget of choice is a #16 ice cream scoop but you can choose any size you like...also avaliable inexpensively at the restaurant supply) and bake it off, checking it every minute or two as it bakes. I look for something on the verge of underbaked...just barely starting to brown around the very edges yet not wet looking in the center. You may need to bake one or two off and let them cool to evaluate because often, what looks underdone when it's hot from the oven is delicious and chewy and perfect once it cools. And keep in mind that a whole pan will require a couple of minutes longer than a single test cookie to achieve the same level of doneness, likewise two pans baking at once vs. one.
So...there are my secrets. If you weren't bored to tears and with your eyes glazed over, you should now be armed with several things to try to improve your own favorite recipe. Let me know how it goes! And do store your latest batch of lovelies in the freezer, won't you? There's nothing worse than a was-great cookie that's gone stale and tired from sitting out on the counter. Put them in a ziplock and freeze them to enjoy, fresh as the day they were baked, for as long as they're likely to last anyway.
Labels: cooking food baking cookies
Comments:
<< Home
What a great tutorial. I'm teaching my girls to bake and I'm learning I have much to figure out myself. Bravo! And Thanks.

Monique here, one of the cookie complainers from last week. Just wanted to share a tip with you after you took the time to share your great suggestions with us. You can make your own baker's sugar (superfine sugar) by processing regular sugar in a food processor. Thanks again for the tutorial.
Great, thorough tips!
Would you mind sharing your molasses cookie recipe from Better Homes and Gardens? :) My molasses cookies always turn out dry and crumble, and I don't know if it's because I use shortening or what. Thanks!
Would you mind sharing your molasses cookie recipe from Better Homes and Gardens? :) My molasses cookies always turn out dry and crumble, and I don't know if it's because I use shortening or what. Thanks!
# posted by  : 12:59 PM
: 12:59 PM
Two things:
1) is there a rule of thumbe for subbing butter for shortening. I agree shortening is awful, and therefore tend to skip those recipes. Is it just 1:1 butter to shortening?
2) I saw on America's test kitchen, that butter at the proper temperature should bend with some resistance, and hold it's shape, but not break. If it breaks it's too cold, if it mushes in your hands it is too warm.
# posted by : 2:06 PM
: 2:06 PM
You left out: Drop that pan half way through the baking process. It's noisy but useful.
# posted by : 2:27 PM
: 2:27 PM
Well, I am the world's WORST cookie baker. You mentioned my complete disaster technique: I never mix that sugar and butter well. Could this be my new calling?????????
Stay tuned THANKS
Is it okay to use a fancy pan with that waxpaper like paper on it? A liner I think it is called....
Stay tuned THANKS
Is it okay to use a fancy pan with that waxpaper like paper on it? A liner I think it is called....
I agree with most of your tips. Down with shortening and margarine! I can definitely tell if cookies have them. They're way too puffy looking.
I disagree on the temp though. I like baking my cookies at 375, or else they spread too much. I also don't cream the sugar and butter (I only barely combine), because it incorporates air, which creates spread.
I disagree on the temp though. I like baking my cookies at 375, or else they spread too much. I also don't cream the sugar and butter (I only barely combine), because it incorporates air, which creates spread.
Good pointers. However, I always use a silpat mat and I love the color and texture of my cookies. Other than that great blog!
-asklorrainenow.blogspot.com-
-asklorrainenow.blogspot.com-
Found you Splatgirl! Your cookies that you brought to CSA picnic were some of the best ever and I have eaten many many cookies in my life time. My son who is equally picky about cookies pounded the chocolate chip nut one and never mentioned that he ate nuts! (he usually won't). I had one of each, one for the road. I learned a few things reading this! Thank you!!!! I too am a butter fanatic and for that matter a whipped cream woman (never never ever use cool whip). Pure Vanilla Extract only - no fakes!! I also have enjoyed looking at all your original Etsy creations! Wow!!! Very inspiring to me. Love your work and recipes. To think, YOU are in MY CSA. Awesome! Your dog is great too. Great pulling weeds along with your commentary that day.
Post a Comment
<< Home
![]()